VPS Hosting Setup Guide: From Purchase to Live Website
If you’ve ever wondered how to take control of your website and move past the limits of shared hosting, VPS hosting is often the next step. When I set up my first VPS, I was nervous.
It felt more technical than shared hosting. But once I walked through the process step by step, it was easier than I thought.
In this guide, I’ll show you exactly how to set up VPS hosting, from buying your plan to putting your website live. We’ll cover everything: connecting your domain, installing a server, securing your site, and avoiding common mistakes. By the end, you’ll feel confident running your own VPS like a pro.
What is VPS Hosting, and Why Choose It?
VPS hosting stands for Virtual Private Server hosting. Think of it as renting your own slice of a powerful server. Unlike shared hosting, you don’t have to compete with hundreds of other sites for resources.
Why VPS over Shared Hosting?
- Faster performance because your resources are reserved.
- Better security with more control over the server.
- Scalable resources when your traffic grows.
- Flexibility to run apps, custom scripts, or host multiple sites.
If you’re running a business site, an online store, or a growing blog, VPS hosting gives you more reliability than shared hosting without the high price of a dedicated server. I noticed the difference the first week I switched; my site loaded faster, and uptime was rock solid.
Step 1 – Purchasing a VPS Hosting Plan
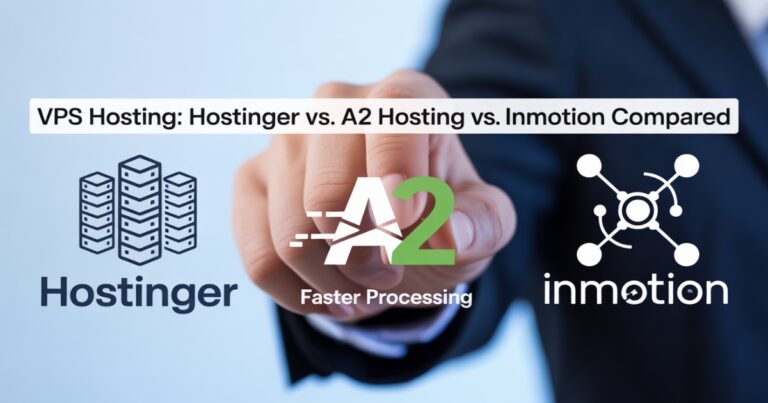
The first step is choosing a VPS host. Look for providers that balance performance, support, and cost. Popular options include DigitalOcean, Linode, Vultr, Hostinger, and Bluehost.
Here’s what to check before you buy:
- RAM and CPU: More resources mean smoother performance.
- Storage type: SSD is faster than HDD.
- Bandwidth: Higher limits handle more visitors.
- Support: Managed VPS comes with help; unmanaged VPS leaves setup to you.
For beginners, I recommend a managed VPS hosting plan. It’s less overwhelming, and you’ll have help if things break. If you’re more technical and enjoy tweaking servers, unmanaged VPS can save you money.
Step 2 – Setting Up Your VPS Server
Once your plan is active, the host will send you login details. Most VPS hosting setups start with SSH access. On Windows, you can use PuTTY; on Mac or Linux, just open the terminal.
Steps to get started:
- Log in as root using the IP and password.
- Update your system:
sudo apt update && sudo apt upgrade -y - Install common tools like nano, curl, and wget.
I remember the first time I ran those commands, it felt intimidating, but in reality, it’s like updating apps on your phone. Keeping your server updated is critical for both performance and security.
Step 3 – Installing a Web Server
To make your VPS serve web pages, you’ll need a web server. The two most popular choices are Apache and Nginx.
- Apache is widely used, beginner-friendly, and works well with WordPress.
- Nginx is faster with high-traffic sites and handles static files better.
Example install commands for Ubuntu:
sudo apt install apache2 -y
# or
sudo apt install nginx -y
Once installed, you can check by visiting your server IP in a browser. If you see a default page, your web server is running. This step is the “aha moment” when you see a real response from your VPS, and you realize you’ve got control.
Step 4 – Configuring Your Domain and DNS
Your server is up, but your domain needs to point to it. This step connects your domain name to your VPS.
- Log in to your domain registrar (like Namecheap or GoDaddy).
- Update the A record with your VPS IP address.
- Wait for DNS propagation (can take a few hours).
Tip: Use tools like DNSChecker.org to see if your records are live globally. Nothing feels better than typing your domain and seeing it load from your own VPS.
Step 5 – Securing Your VPS Hosting Setup
Security is often overlooked by beginners, but it’s vital. Here are the basics:
- Create a new user and avoid logging in as root.
- Disable root login for SSH.
- Set up SSH keys instead of passwords for safer logins.
- Install a firewall like UFW:
sudo apt install ufw
sudo ufw allow ssh
sudo ufw allow http
sudo ufw allow https
sudo ufw enable
Install SSL with Let’s Encrypt so your site shows HTTPS.
Adding SSL not only protects data but also improves SEO rankings. I once skipped this step on a test site, and browsers flagged it as “Not Secure.” Don’t make that mistake.
Step 6 – Deploying Your Website on VPS
Now it’s time to make your site live. You have two main options:
- Upload your files using SFTP or Git.
- Set up a CMS like WordPress.
If you’re installing WordPress, you’ll also need a database:
sudo apt install mysql-server -yThen create a database, set up PHP, and connect it to your web server. With Apache or Nginx + PHP + MySQL, you have what’s called a LAMP or LEMP stack, which powers most websites today.
I recommend testing with a simple HTML file first. If it loads fine, then move on to bigger setups like WordPress. It helps avoid confusion if something breaks later.
Step 7 – Testing and Going Live
Before announcing your site, test it.
- Visit your domain and check if it loads.
- Test forms, buttons, and links.
- Use GTmetrix or PageSpeed Insights to measure speed.
- Fix common errors (permissions, broken DNS, missing PHP extensions).
I always test on both desktop and mobile. Once, I had a site that looked fine on my laptop but was broken on a phone. Testing across devices saved me from angry messages later.
VPS Hosting Setup Best Practices
After your site is running, keep your VPS healthy with a few habits:
- Update regularly: Run updates weekly to patch security risks.
- Monitor performance: Use
htopor server dashboards. - Backup often: Set up automatic backups with your host or use tools like Rsync.
- Check logs: Errors often hide in log files; review them when issues arise.
- Use monitoring tools: Services like UptimeRobot alert you if your site goes down.
Think of a VPS like a car; regular maintenance keeps it running smoothly. Ignore it, and problems build up.
Common Mistakes to Avoid in VPS Hosting Setup
From my own experience, here are pitfalls to avoid:
- Ignoring updates: leaving your server vulnerable.
- Forgetting backups: risking total data loss.
- Using weak SSH passwords: an open door for hackers.
- Picking an unmanaged VPS without enough technical knowledge.
- Skipping DNS setup checks: leading to downtime.
Each of these mistakes can cost hours of frustration or even business revenue. Spending a little extra time upfront saves headaches later.
FAQs About VPS Hosting Setup
1. What is VPS hosting, and how does it work?
VPS hosting uses virtualization to split a physical server into private sections. Each user gets dedicated resources.
2. Is VPS hosting good for beginners?
Yes, especially with managed VPS hosting. It gives you power without needing deep technical skills.
3. Do I need cPanel for VPS hosting setup?
No. You can set up and manage a VPS with free tools like CyberPanel or via command line.
4. How do I connect a domain to VPS hosting?
Update your domain’s DNS records (A record) to point to your VPS IP.
5. Can I host multiple websites on one VPS?
Yes, you can configure Apache or Nginx to handle multiple domains (called virtual hosts).
6. How much does VPS hosting cost?
Basic unmanaged VPS plans start at around $5–10 per month. Managed VPS usually starts at $20–30 per month.
Final Thoughts: From Setup to a Live VPS Website
We started with choosing a VPS host, then moved step by step through server setup, domain linking, security, and finally launching your site. VPS hosting may feel advanced at first, but once you walk through it, you’ll realize it’s just a series of small steps.
When I moved my own site from shared hosting to VPS, the difference in speed and stability was immediate. If you follow this guide, you’ll have the same confidence in running your own server. Now it’s your turn to set up your VPS and put your website live.